-(2).png)
The Assessment Tool
This tool is currently in beta.
We're actively improving the Assessment Tool based on real classroom use, and your feedback makes a real difference. If something isn't working as expected, feels confusing, or could work better for you and your students, we'd love to hear it. Please share your thoughts at contact@mathfactlab.com.
Assessment data can currently only be viewed by the teacher who assigned the assessment. As the tool is in beta, this limitation is intentional — allowing us time to refine and validate the feature before expanding its audience. As we continue to build out the tool, we plan to expand access to include administrators. For now, if you wish to share assessment results, please export them.
We don't have a specific timeline for an expanded rollout to share just yet, as software development can be difficult to predict, but rest assured we are eager to bring a fully functional version of the Assessment Tool to market as soon as we reasonably can.
The Assessment Tool is not available with our Family Plan accounts.
Table of Contents
- Assessment Tool Overview
- Usage Precautions
- How to Launch an Assessment
- Monitoring Student Progress During the Assessment
- How Students Start an Assessment
- Reviewing Assessment Results
- Exporting Reports
- Choosing the Assessments to Display
- Ending an Assessment
What is the Assessment Tool?
The Assessment Tool allows teachers to assess students’ math fact fluency at different points throughout the school year. Teachers can assign assessments to individual students or entire classes.
There are ten different assessments to choose from. Each assessment focuses on one of the four operations and a specific set of facts included in MathFactLab’s program stages, such as Addition Within 5, Subtraction Within 10, or Division – Foundational Facts.
The Response Rate can be set separately for each assessment, from 3 to 10 seconds.
This setting can also be changed retroactively, allowing previously completed assessments to be evaluated using a different response rate if needed.
Problems are presented in a randomized order unique to each student, helping prevent students from copying answers during in-class assessments. The assessment format will be familiar to students because it closely resembles the Level Lifter assessments they already complete in MathFactLab.
Are there any precautions to be aware of before using the Assessment Tool?
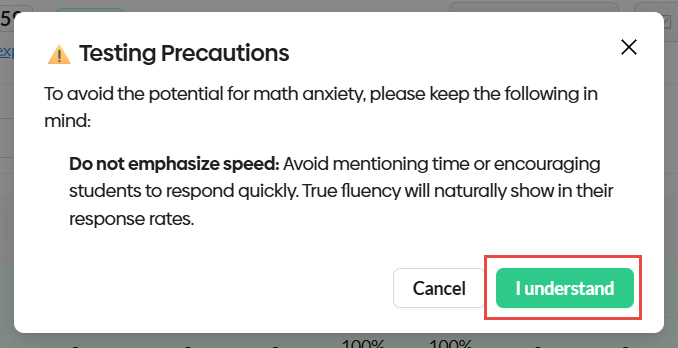
To avoid the potential for math anxiety, when you are preparing students to take an assessment, do not emphasize speed. Avoid mentioning time or encouraging students to respond quickly. True fluency will naturally show in their response rates.
How do I launch an assessment using the Assessment Tool?
- Begin by clicking on the Assessment Tool tab.

- Click on the Filter button if you wish to select specific grade levels, classes or students with specific tags for the assessment. (When using the Filter tool, make sure you click on the Apply Filter button after making your selections.)
- Use the checkboxes to select the students who will be taking this assessment.
- From the Assessment Selection drop-down menu, select the assessment you want these students to take.
- Select the Response Rate you want to use for the fluency benchmark for this assessment. This response rate can be changed if you want to see the impact of that change on the fluency scores of completed assessments.
- The Date Range option allows you to choose the time period from which assessment scores will be displayed.
- Click on the Assess button to start the assessment.

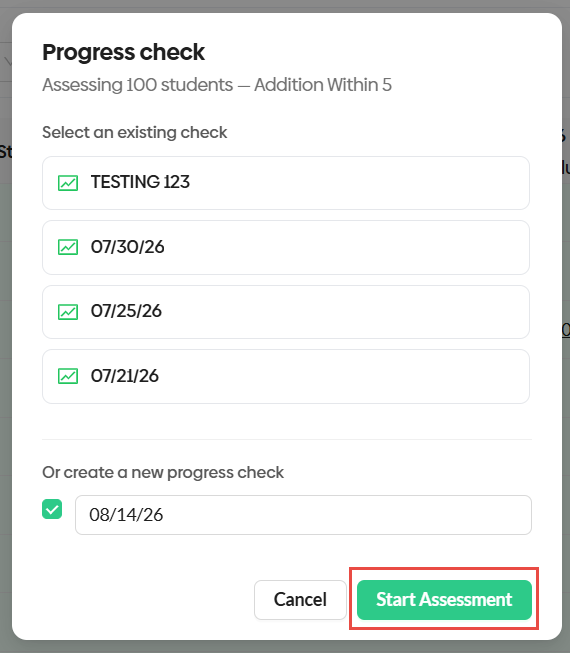
After clicking the Assess button, the pop-up menu shown below will allow you to choose an existing test or create a new assessment. The default name for a new progress check will be the current date, but you can assign any name. After making that selection, click on the Start Assessment button.
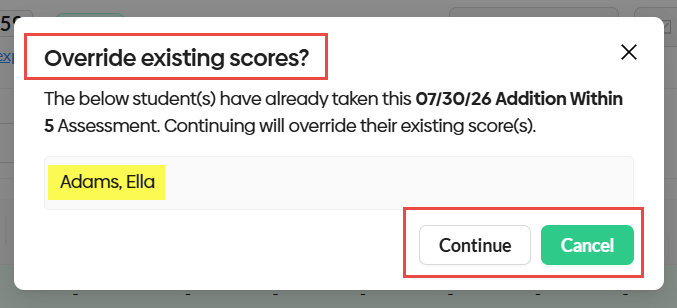
If you select an existing assessment and any of the students you are assigning have already completed an assessment with that name, you will see a pop-up, like the one below, warning that their previous scores will be replaced by the scores from the new assessment.
After selecting the assessment to be administered, you will be asked to confirm that you understand the information in the pop-up shown below, which discourages emphasizing speed when giving your students instructions before they take the assessment.
After clicking the I Understand button, the assessment will become available to the selected students. Students will need to enter the Assessment Code.
Make the Assessment Code available by clicking on the Display Code button.

You will be given the option to display the code in the current tab or a new tab.
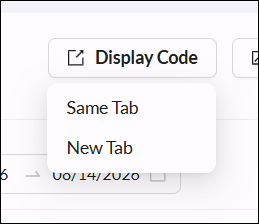
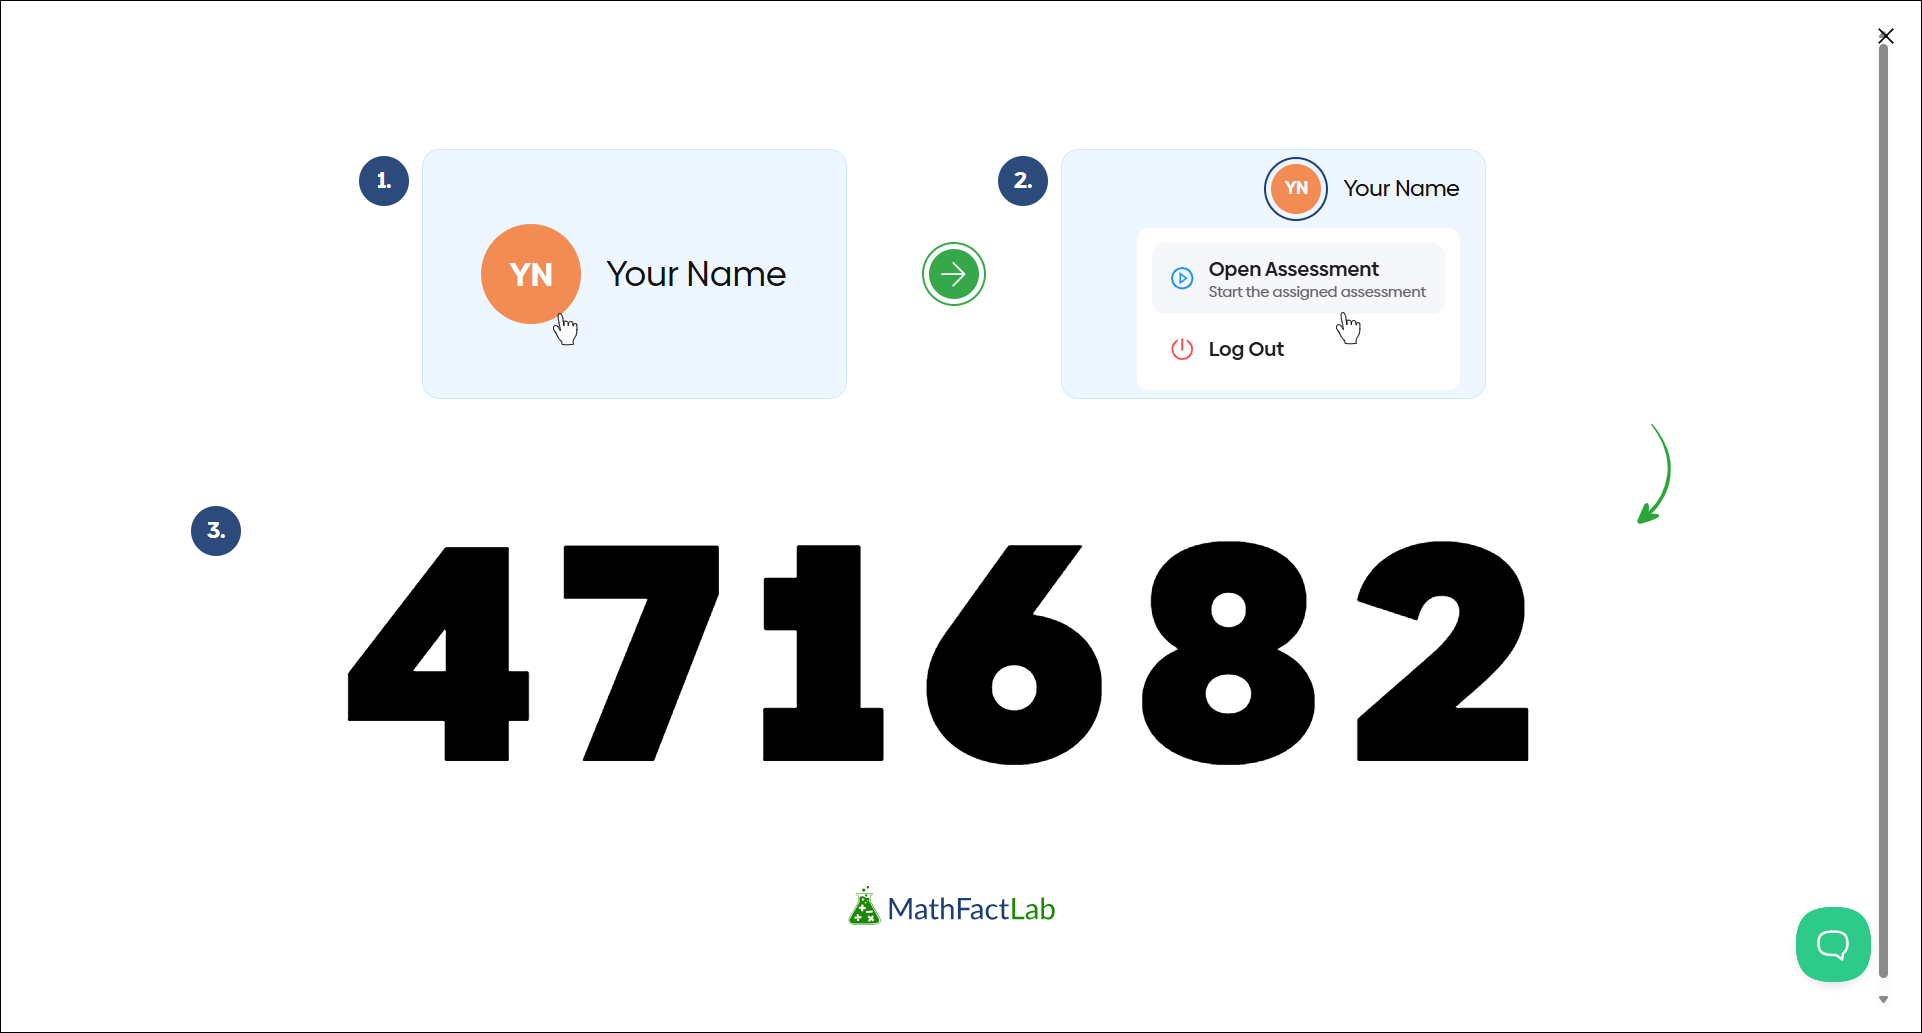
Selecting Same Tab will cover the current screen with one displaying the Assessment Code, along with step-by-step visuals on how students start the assessment.
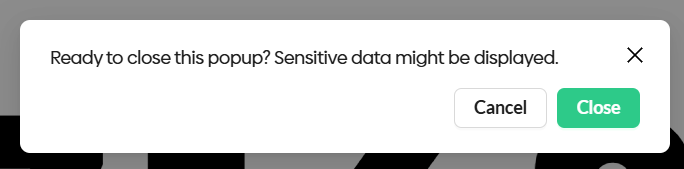
Closing this screen will trigger a warning that the test administrator may be displaying sensitive student data, in case the screen is being projected or shared with the class.
If a New Tab was selected, the same message will be displayed but on a separate tab. The teacher will need to return to the previous tab to continue with the testing process.
To start the test, students will need to:
- Log in to their MathFactLab account.
- Click their profile button.
- Select Open Assessment.
- Enter the code displayed.
After your students have completed these steps, you will need to approve them to start the test.
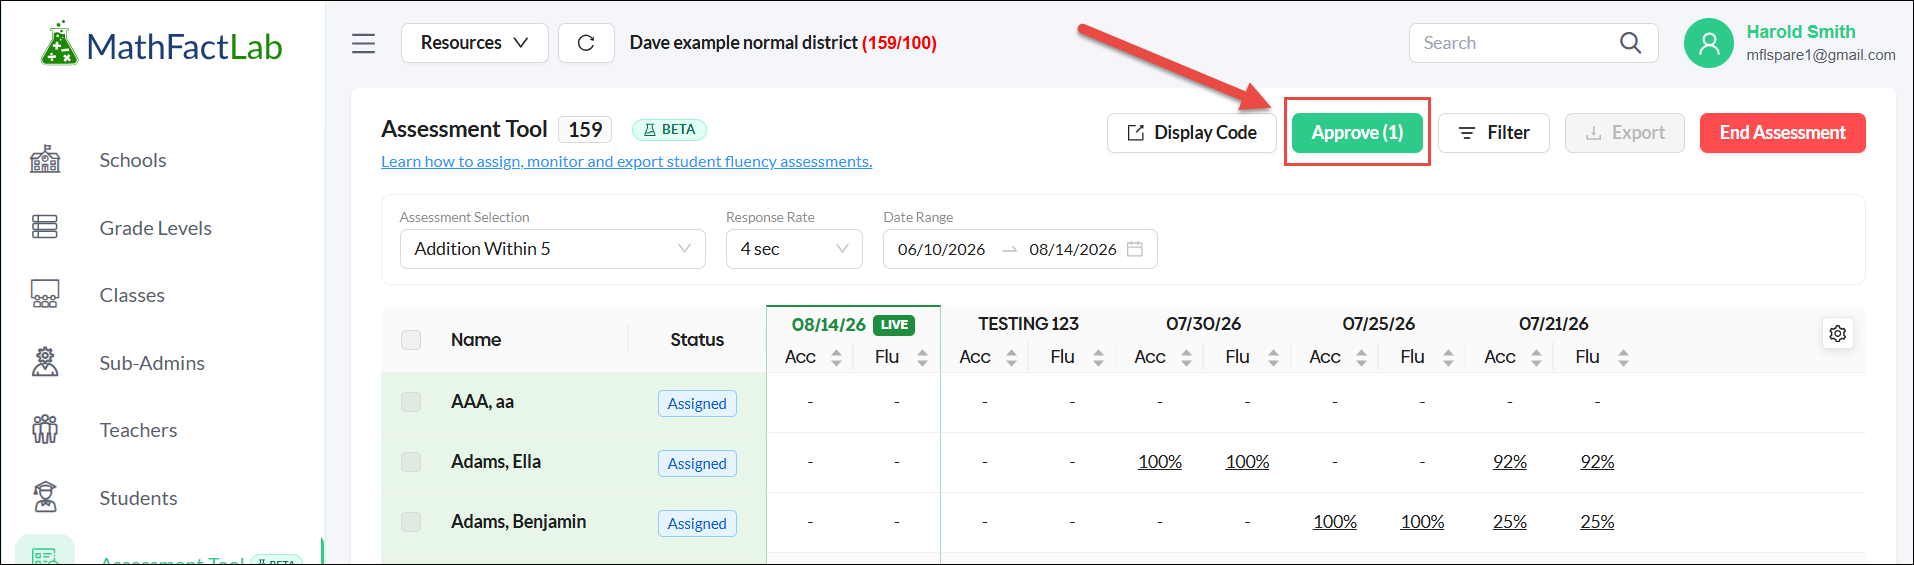
Can I monitor the students' progress during the assessment?
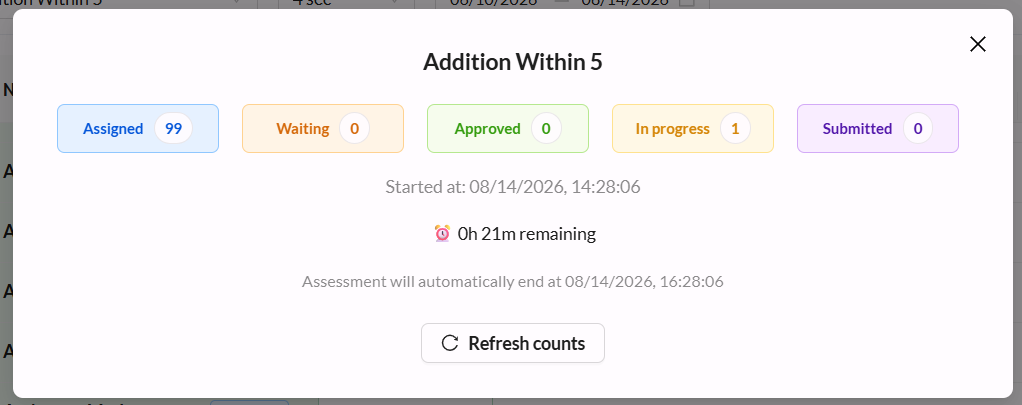
Yes, during the assessment, you can observe the progress your students are making by clicking on the Assessment Status button at the top of the screen.

The assessment status window will show the number of students currently at each stage of the assessment process and the amount of time remaining for the students to begin the assessment.
How will students start the assessment?
During the two-hour window that the assessment is live, students will need to:
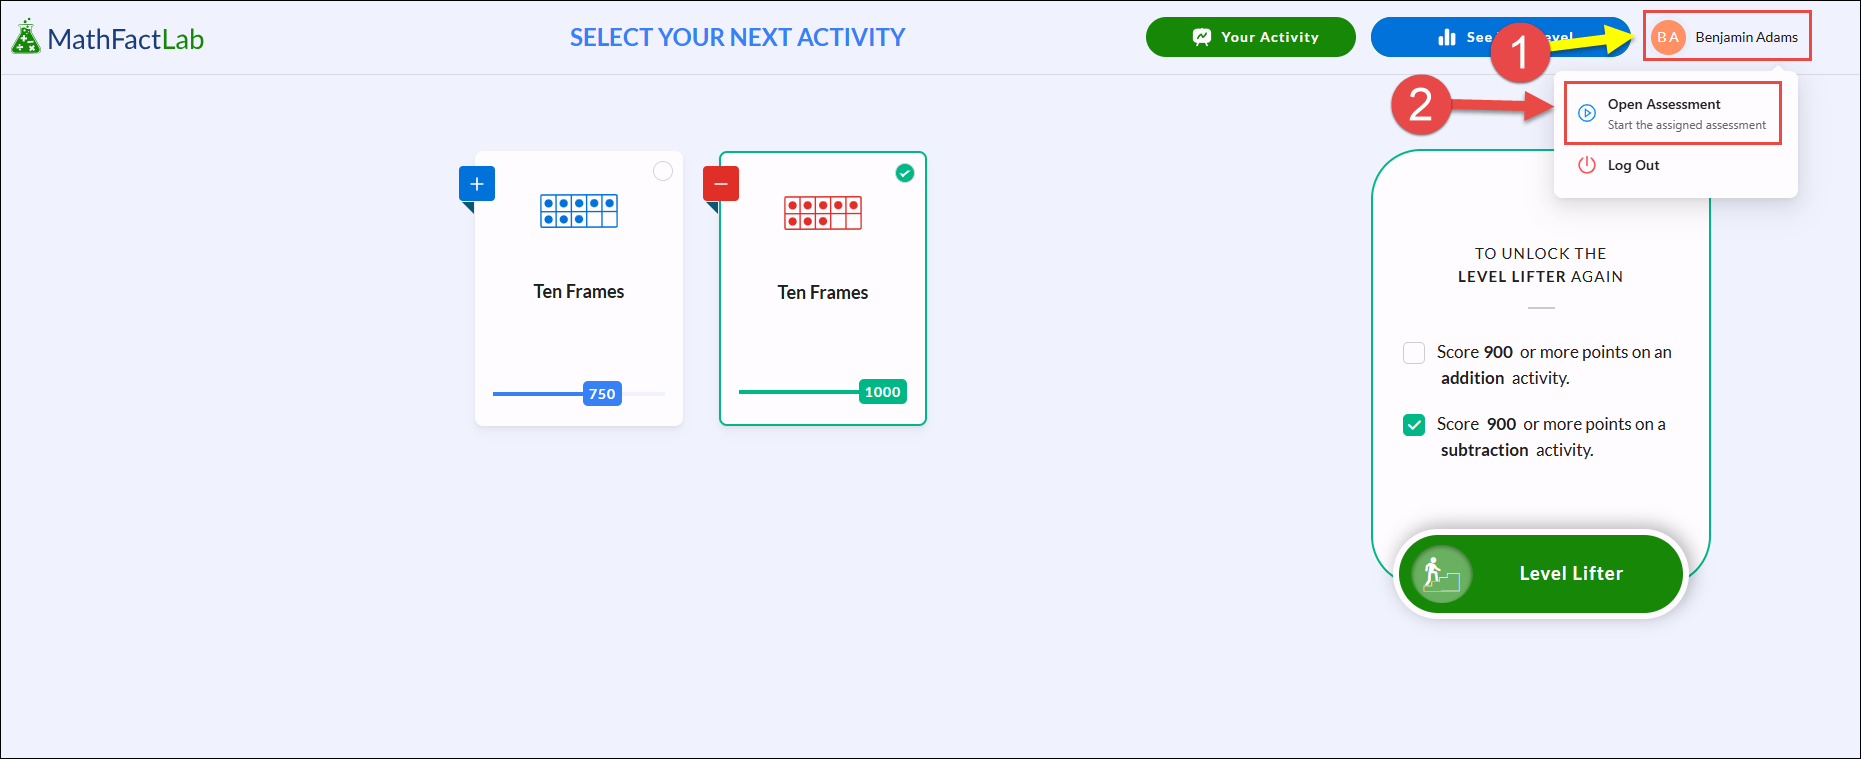
- Log in to their MathFactLab account and click on their profile.
- From the drop-down menu, select Open Assessment.
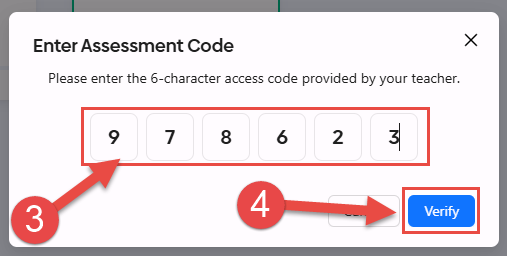
- In the Enter Assessment Code pop-up window, they will enter the 6-character access code provided by their teacher.
- Then click on the Verify button.
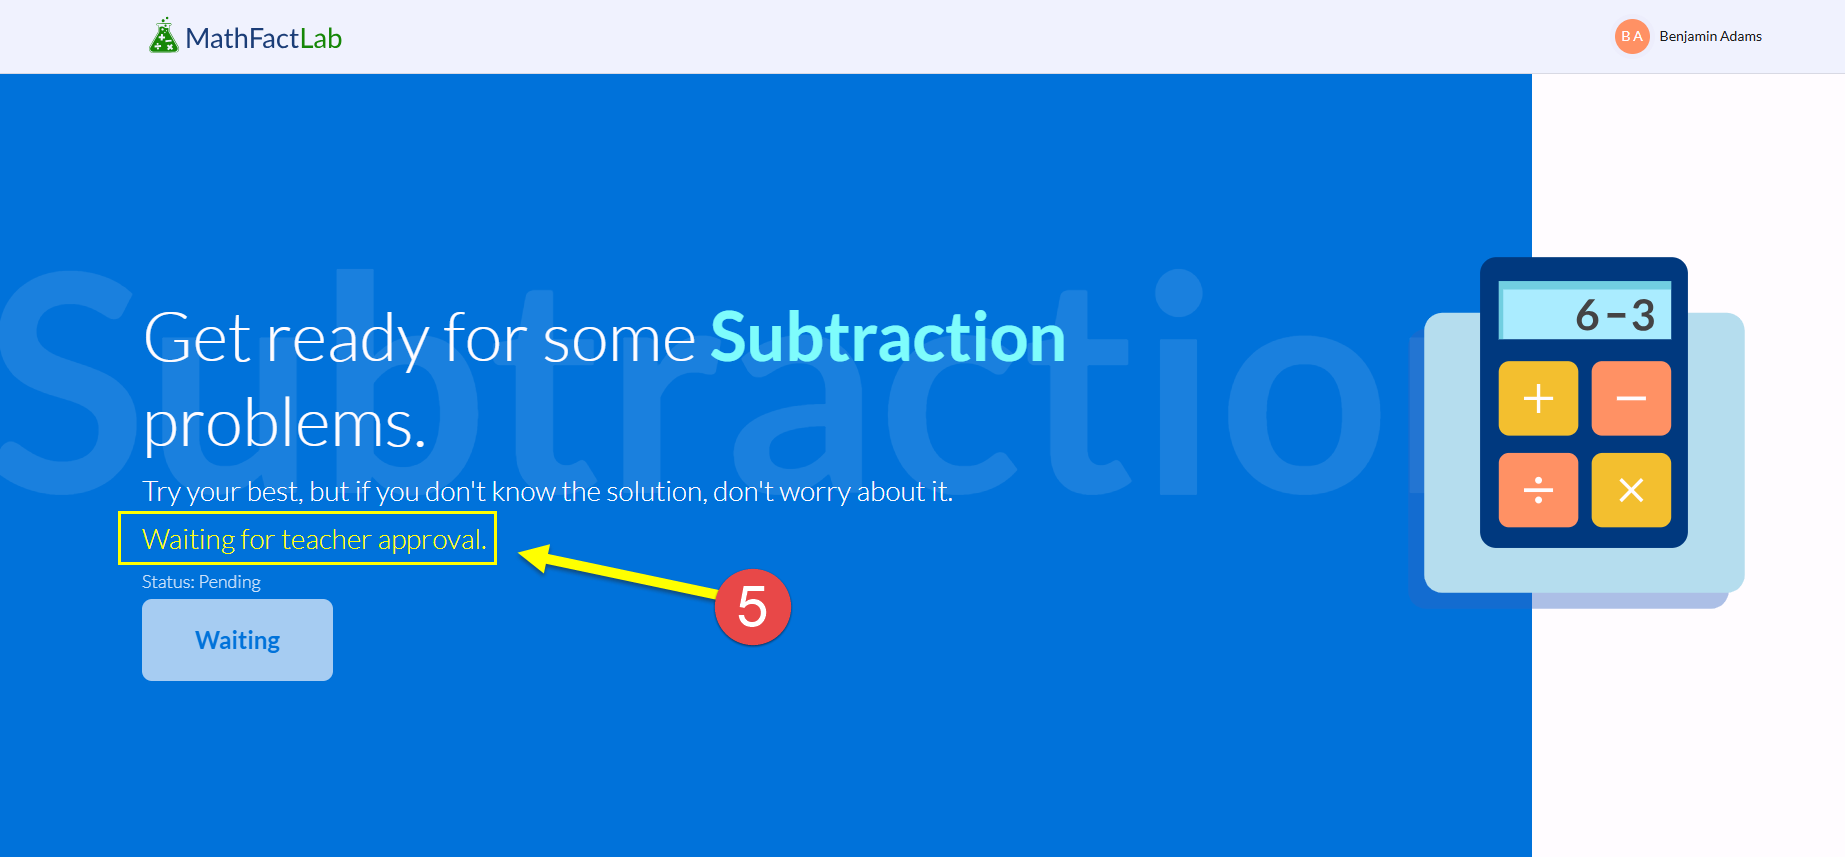
- Students will be taken to the assessment, where they will need to wait for their teacher's approval before they can start the test.
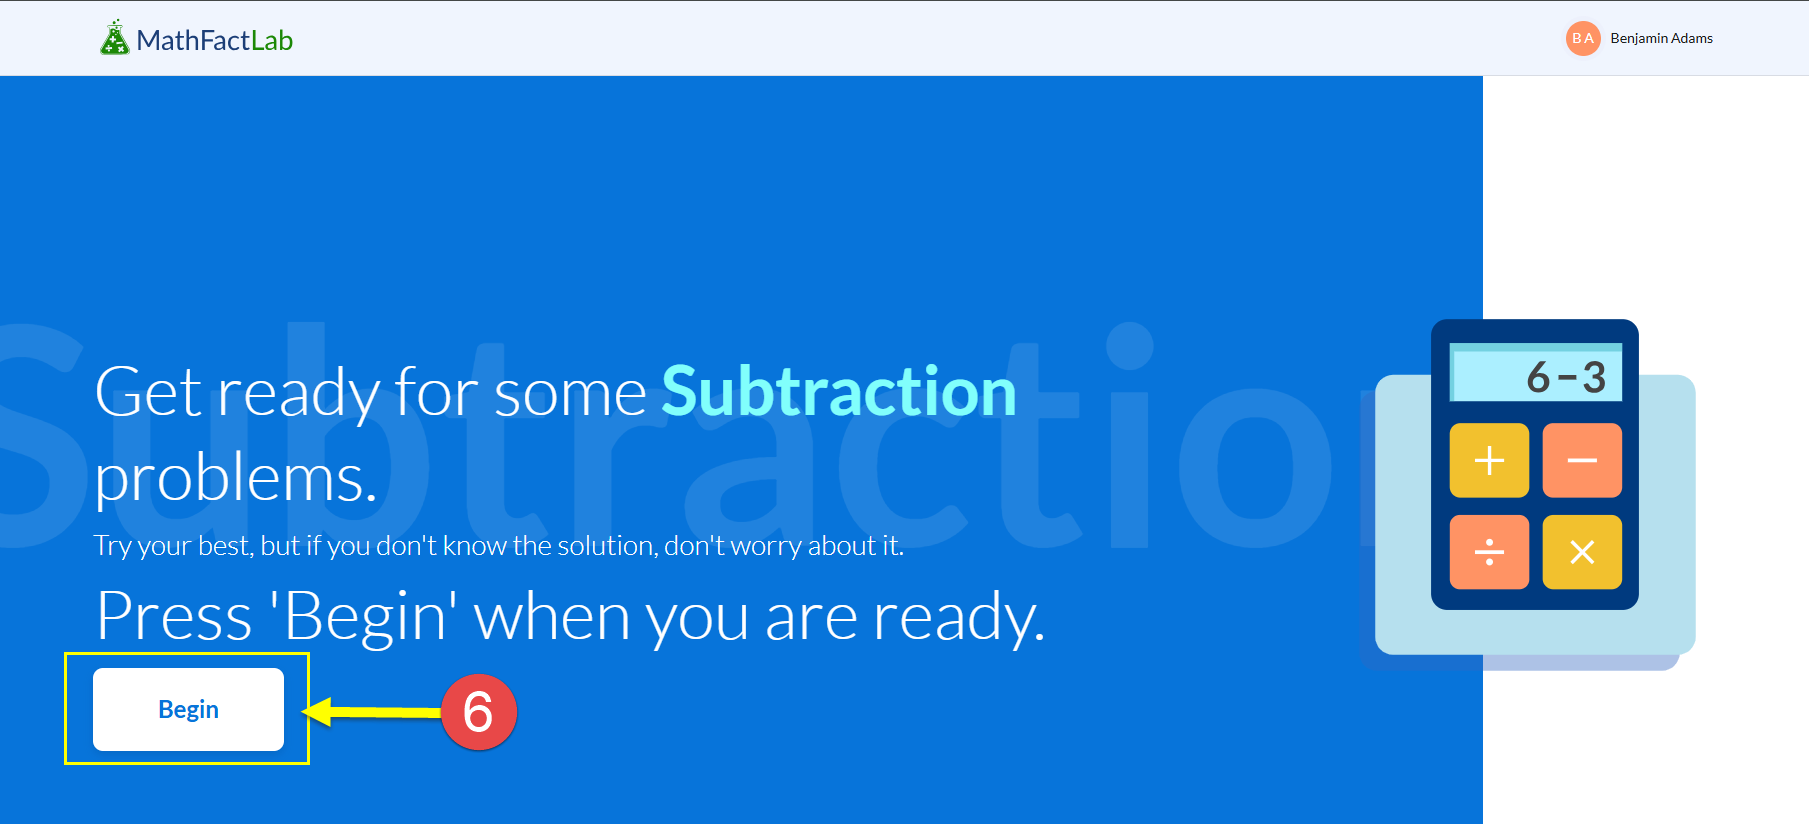
- After being approved, students will click on the Begin button to start the test.
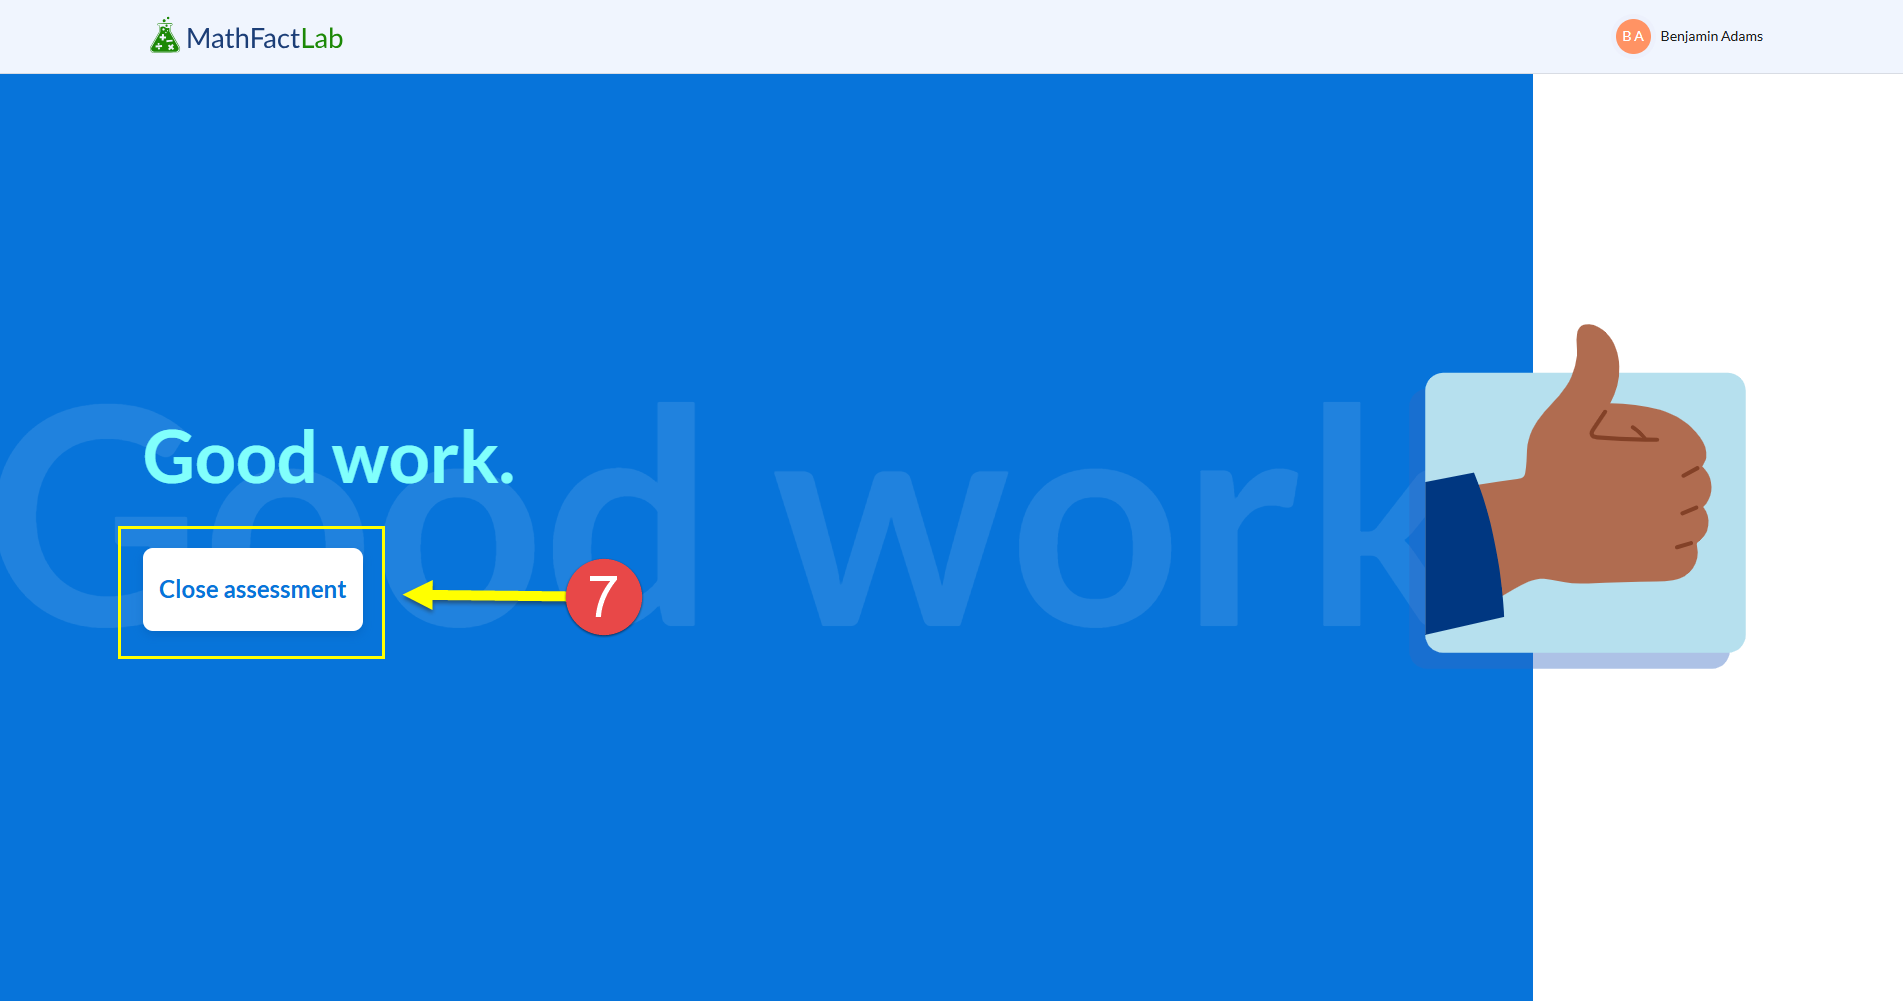
- Once finished, students can click on the Close Assessment button to continue working in their current level in MathFactLab.
How will the teacher see the assessment results?
The assessment results will be available immediately, but the test administrator may need to refresh their screen to see the results.
- The accuracy and fluency results will be seen for all the assessments taken within the chosen time frame.
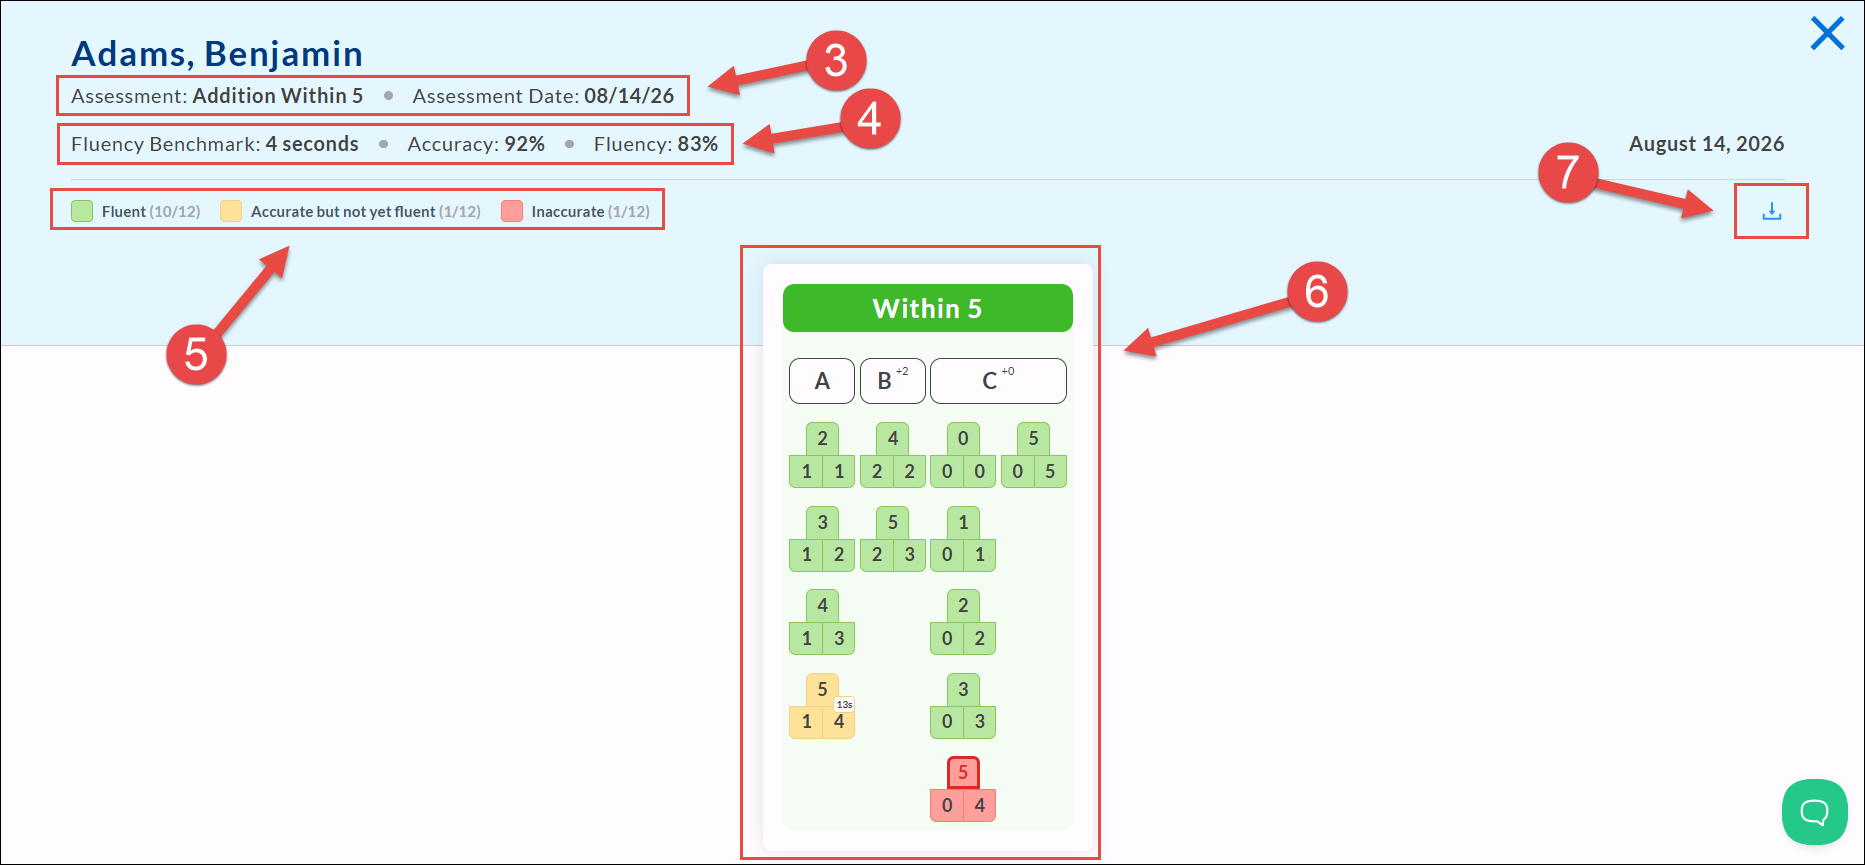
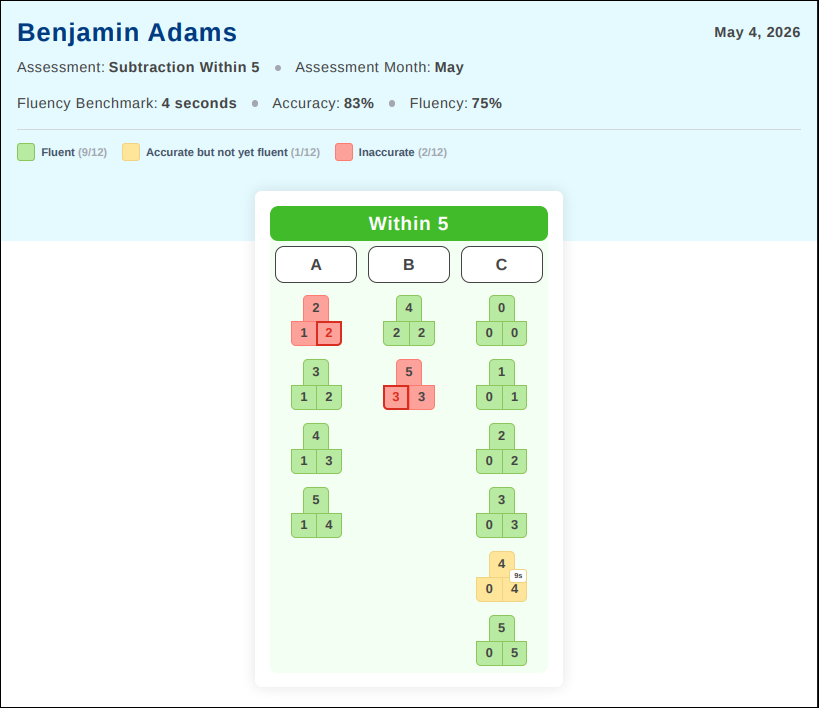
- Clicking on any of the scores will open a color-coded report for that assessment for that specific student.

- The report shows the levels being assessed and the date of the assessment.
- The report also gives the fluency benchmark for the test and the student's accuracy and fluency scores.
- Student responses that are both accurate and fluent are indicated by green triangles. Accurate-but-not-fluent responses are shown in yellow, and incorrect responses are colored red. The red box shows the student's incorrect response.
- The results are grouped by fact families in columns that mirror the levels in MathFactLab.
- The individual's report can be exported as a PDF file.
Can Progress Monitoring Reports for multiple students be exported?
Yes, reports may be exported as CSV spreadsheet files for multiple students or a set of Individual PDF files.
To export reports:
- Start on the Assessment Tool tab.
- Select the students you wish to include in the report.
- Select the Assessment you wish to view.
- Select the Fluency Benchmark you wish to apply to the report.
- Select the Date Range of the reports you wish to include.
- Click on the Export button.

- In the Export menu, choose the Report Type you wish to export: CSV or Individual PDFs.
- Apply a Fluency Benchmark. That benchmark does not need to be the one chosen when you administered the assessment.
- Choose one or more of the Assessment Sessions you wish to include in the report.
- Click on the Download button.
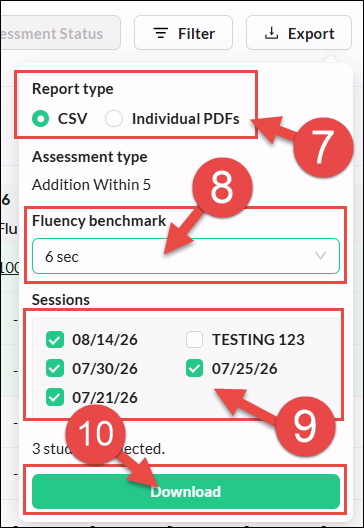
A notification at the top of the screen will verify that your reports will be created shortly. A pop-up will notify you when the report is ready.

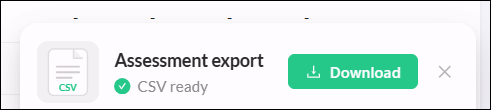
The exported CSV file will include all the students you chose for the report, their Accuracy and Fluency scores for each of the assessments you included, and each student's growth between tests.

The exported PDF will contain one report per student, matching the individual report you see when clicking on a student's score (as described above).
Can I choose to display only the specific assessments I wish to see in the Assessment Tool tab?
Yes, you can choose to display or hide any of the assessments. To do this:
- Start on the Assessment Tool tab.
- Click on the Sessions Visibility icon.
- Check or uncheck the boxes for the sessions you wish to display.

How do I end the Assessment?
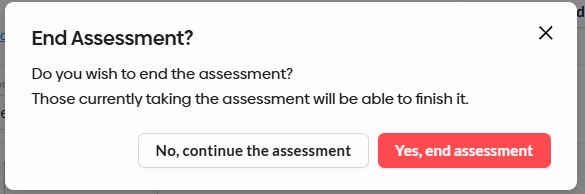
Assessments end two hours after they have been launched or may be ended at any time by clicking on the End Assessment button. A pop-up will ask you to verify that you want to end the assessment.
If any students are taking the assessment when you end it, they will be able to continue until they have finished.