How to Add Students to a Teacher Plan Account
Note: Teachers who are part of a school/district account cannot add classes or students. This is done by the account administrator.
There are multiple ways to add students to your Teacher Plan account:
- Add multiple students by copying and pasting (or entering) a list
- Importing students with a .csv file
- Adding students individually
Add Multiple Students by Copying/Pasting (Or Entering) a List
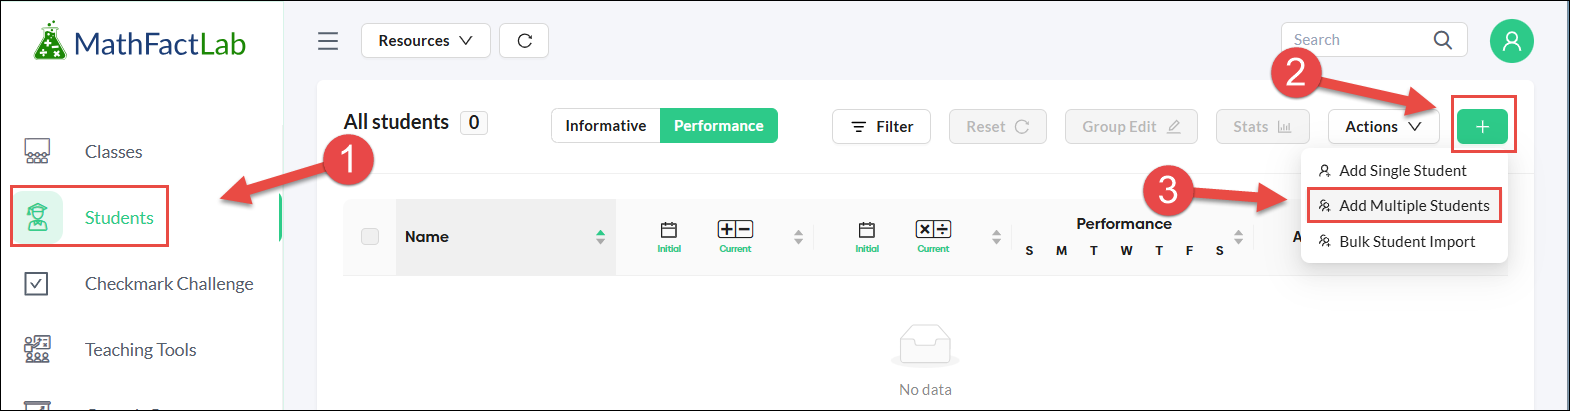
- Go to the Students tab.
- Hover over the green '+' button in the top right corner.
-
Select 'Add Multiple Students'.
- You will be shown a 4-step pop-up that will walk you through the steps.

Step 1- Select a class.

Step 2- Enter student names.

Step 3 - Edit Student Details.

Step 4 - Create Login Cards.

Import Students with a .CSV File
The class(es) these students will be imported into must be created before using this CSV File method to import your students. Make note of the class code(s).
- Go to the Students tab.
- Hover over the green '+' button in the top right corner.
-
Select Bulk Student Import.

-
You will be shown the pop-up below. Just follow the steps listed to complete the process.

- Only the Class Code and students' first and last names are required on the CSV file. The current limit is 100 students per file. Make sure to delete the sample students before you save.


Be sure to save it as a CSV file.

- Upload the file by clicking the upload field or dragging the .csv file to it. Depending on the size of the file, importing may take up to a minute or two.

- You will be alerted to any possible errors in your CSV file after you attempt to upload it.

- You will see this confirmation message, and all of your students should be visible after a successful upload.

To Add Students Individually
To add students, first make sure that you have created at least one class.
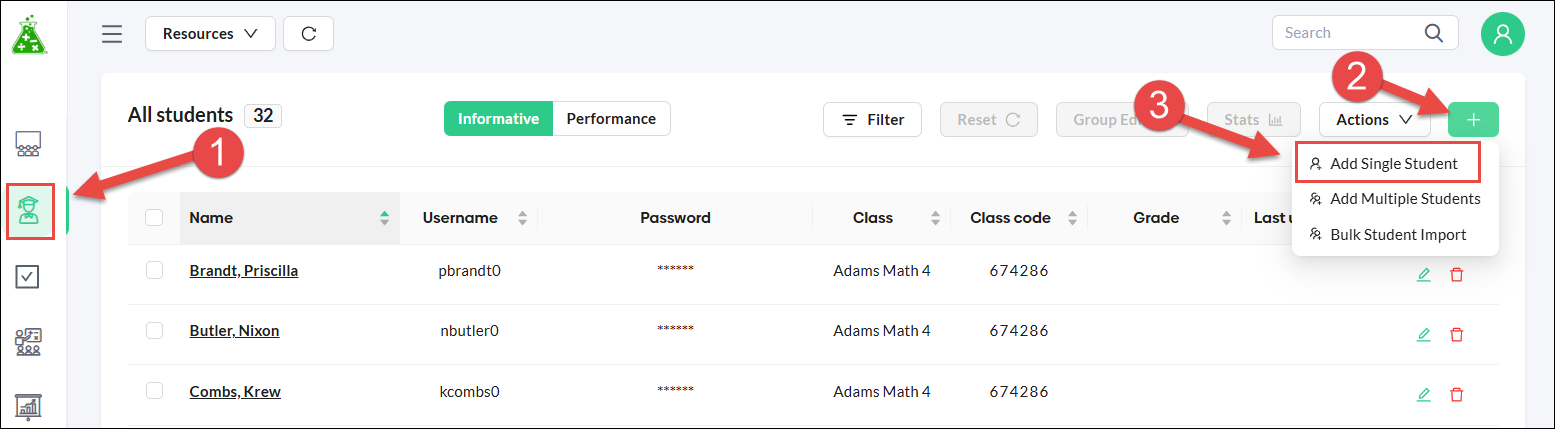
- Go to the Students tab.
- Hover over the green '+' button in the top right corner.
-
Select 'Add Single Student'.
- In the New Student screen, enter the student's last name and first name. The student's username and password will be autogenerated, but you can override these.
- Make sure to select the correct class (if you have created more than one) and the Learning Mode that you would like the student to begin on.
- Grade level, preferred language, and tagging are all optional.
- Click the Add Student button in the top right to save.


To add additional students, follow the same process.
@ZOHO