10 Ways to Differentiate to Meet Student Needs
MathFactLab offers several ways you can differentiate to better meet student needs:
- Adjusting the required fluency rate
- Changing the Passing Percentage for Level Lifter assessments
- Giving Level Lifter interviews
- Unlocking Level Lifters
- Advancing Students Manually
- Hiding Strategies/Activities
- Hiding Hints
- Text-to-Speech
- Student experience language selection
- Session Length
Adjusting the Required Fluency Rate
A student's 'Required fluency rate' is the number of seconds a student is allowed per response to be considered fluent. Fluency rates can be set from 2 to 120 seconds per problem. You can edit student fluency rates individually or as a group.
When you do so, it is worth keeping the following in mind:
- For students in fourth grade and up, the default fluency rate is 4 seconds. While the literature generally recommends 3 seconds, we give an additional second for typing time.
- To allow additional time for younger students to respond to prompts, the default fluency rate for those in kindergarten through second grade is 6 seconds and for third graders, it’s at 5 seconds.
- Fluency rates can be set from 2 to 120 seconds per problem. When you do so it is worth keeping the following in mind:
- Students vary widely in processing speed, and what works for most will not suit all. To ensure MathFactLab remains a positive and productive experience, expect that around 20% of students to need a more generous fluency rate than the default. Adjust the required fluency rate as needed to strike a balance between challenge and achievability, so all students can make meaningful progress.
- Math ability and speed are two separate things. You may occasionally have strong math students who also need additional time.
- For students working on addition/subtraction - in order to break the habit of counting on or counting fingers - it is important that their required response time is no longer than necessary.
- For students practicing multiplication, you may wish to consider a looping approach to the basic facts. With this method, students first work through the basic facts with a generous fluency rate. Once mastered at this rate, they work through again at their
Click here to learn how to change student fluency rates.
Changing the Passing Percentage for Level Lifter Assessments
Providing flexibility in passing requirements helps struggling students stay motivated. A student's score for any Level Lifter assessment is determined by the accuracy and fluency (speed) of their responses using the following point system:
- Responses that are fluent and accurate receive full points.
- Responses that are accurate but not fluent receive half points.
- Responses that are inaccurate receive no points.
To pass a Level Lifter assessment, a student must earn a minimum percentage of the total possible points. This passing benchmark is set by the teacher, and we call this the Passing Percentage.
The teacher can change the passing percentage for Level Lifters for individuals or groups of students. The passing percentage may be set from 50% to 100%. The default setting is 80%
Click here to learn how to adjust the Passing Percentage for your students.
Level Lifter Interviews
Some students, for a variety of reasons, do not perform to their full potential on standard Level Lifters. For them, we have built Level Lifter Interviews. Level Lifter Interviews ask the same questions as a typical Level Lifter, but they are implemented by the teacher on the teacher's device and do not require any typing by the student.
You can give a student a Level Lifter Interview at any time. The student does not need to unlock the Level Lifter first. (Of course, we would recommend that the student completes the practice activities first, in order to better prepare them.)
Click here to learn how to begin a Level Lifter Interview.
Unlocking Level Lifters
You may feel a student has had sufficient practice at a particular level and is ready for the Level Lifter. Rather than having the student complete all the required tasks, you can just unlock the Level Lifter for them.
Note: This is a one-time action. In other words, after the student has taken the Level Lifter, it will be locked again. The student will then need to meet the typical requirements to unlock it again.
Click here to learn how to Unlock Level Lifters.
Advancing Students Manually
If you are confident that a student is ready to progress to the next level, or even skip a few levels, you can advance them manually.
Click here to learn how to change a student's level manually.
Hiding Strategies/Activities
We offer you the ability to hide certain activities for all or just some of your students. This might be helpful if
- Your students are not familiar with certain models offered through MathFactLab,
- A particular student struggles with certain models,
- You wish to simplify the workload for some or all of your students.
For the Addition and Subtraction Learning Mode: To help our kindergarteners and first graders, by default, ten frames are the only model shown to them. You, of course, can unhide the other addition/subtraction models to provide them with a wider range of options. For students in second grade and up, by default, all five activities are activated. As many as four activities can be hidden, but Ten Frames are always active; any or all of the other four may be hidden.
For the Multiplication and Division Learning Mode: Teachers can only hide three of the activities in the multiplication/division learning mode: number lines, area models, and the fingers trick (for the times 9 problems).
The option to hide or show activities is available only at the basic levels of both learning modes.
Click here to learn how to hide strategies/activities.
Hiding Hints
We expect to offer the ability to hide hints by the beginning of September 2025.
Some teachers have reported having a student who overuses the hint button. For these particular students, we offer the ability to hide the hint button.
- Selecting this option will hide the hint button after the first five problems in each problem set.
- We don’t hide the hint button from the first problem, as the hint often helps students better understand the strategy at hand.
- We do not recommend hiding the hint button for all of your students, only for those who have become over-reliant on it.
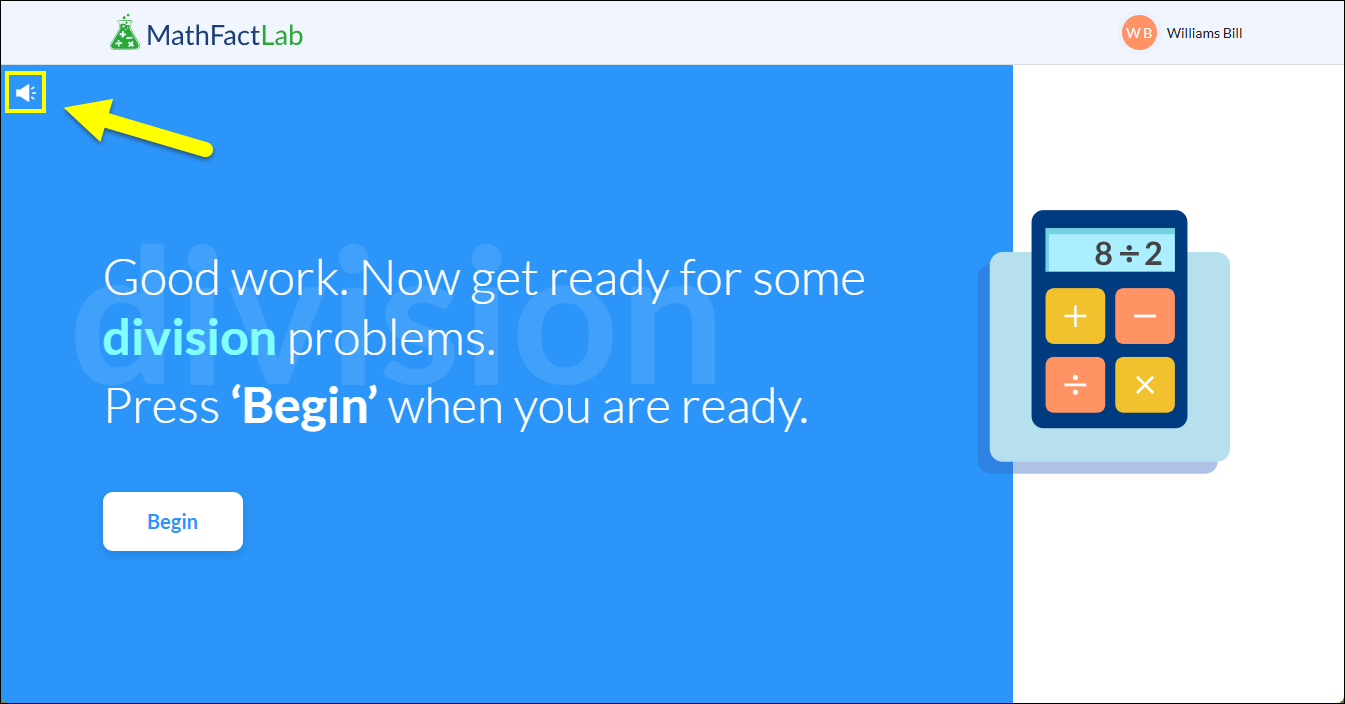
Text-to-Speech during Placement Test
We expect to offer Text-to-Speech across the student experience by September 2025.
If a student has difficulty reading the instructions they will be receiving during the placement test, they can click on the speaker icon in the top left corner and the text will be read to them. This audio assist will only read the instructions; it will not read the math problems.
Student Language Selection
Currently, English and Spanish are the only available options for students. We expect to offer French as well, beginning in September 2025.
A Spanish version of MathFactLab can be enabled for individual students. If students are currently using MathFactLab when this option is enabled, they will need to log out and log back into the program to see the change.
Currently, it is not possible to turn this feature on for multiple students at the same time. It would need to be done one student at a time. (This will soon be rectified.)
Click here to learn how to adjust language settings.
Session Length
Students are automatically logged out of MathFactLab at the end of each session. Some days you may want students to have a longer session, while other days a shorter one is more appropriate. For weekly usage recommendations, please refer to this guide.
You can easily adjust the length of student sessions. Both administrators and teachers can set sessions anywhere from 5 to 20 minutes. The steps for changing the time for an individual student or multiple students can be found here.
@zoho